
Getting Started with 3D Printing: A Beginner’s Guide
3D printing has rapidly evolved from a niche hobby to a widely accessible technology with the power to revolutionise industries and spark creative innovation. Whether you’re looking to create personalized objects, explore engineering solutions, or just dive into a new creative outlet, 3D printing offers exciting possibilities. For beginners, however, the learning curve may seem steep. In this guide, we’ll walk through the essentials of starting with 3D printing, from understanding the technology to creating your first print.
1. Understanding the Basics of 3D Printing
3D printing, or additive manufacturing, involves creating three-dimensional objects from a digital file by layering material. The most common type of 3D printing for beginners is Fused Deposition Modeling (FDM), where a plastic filament is melted and extruded layer by layer to form a solid object. There are other techniques, such as Stereolithography (SLA), but FDM is typically more affordable and easier to grasp.
Key components include:
- 3D Printer: The machine that builds the object.
- Filament: The material used to print (commonly PLA or PETG plastic).
- 3D Model: A digital file that defines the object’s shape, typically in STL format.
- Slicer Software: Transforms the 3D model into printable instructions.
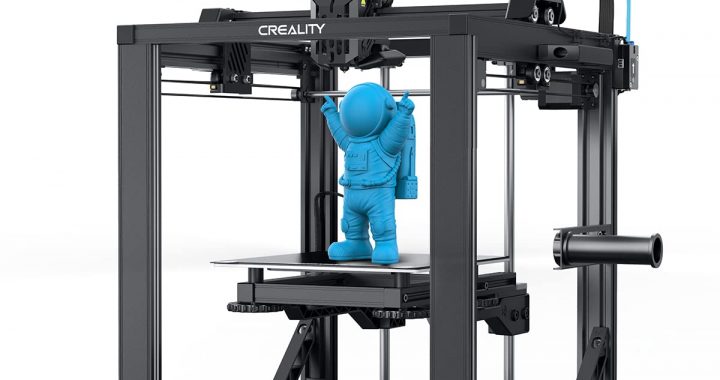
2. Choosing the Right 3D Printer
When starting out, choosing a user-friendly 3D printer is important. Consider these factors:
- Budget: Beginner 3D printers range from £200 to £500. Brands like Creality, Anycubic, and Prusa offer affordable, high-quality machines.
- Build Volume: This is the size of the objects you can print. Standard beginner printers have a build volume of around 220 x 220 x 250 mm.
- Filament Compatibility: Ensure the printer can handle common materials like PLA and ABS, which are easy to work with.
- Ease of Use: Look for features like auto bed leveling and touchscreen interfaces to simplify setup and operation.
Popular starter models include the Creality Ender 3 and Prusa Mini+.
3. Finding and Creating 3D Models
There are two ways to get 3D models: downloading pre-made designs or creating your own.
- Downloading Models: Websites like Thingiverse, MyMiniFactory, and Cults3D offer free and paid designs. For beginners, this is a great way to explore a wide range of objects without needing modeling skills.
- Designing Your Own Models: To create your own objects, you’ll need 3D modeling software.
- Beginners can start with Tinkercad: A free, browser-based tool perfect for simple designs.
- Fusion 360 or Blender: More advanced, but offer powerful features for complex projects.


4. Slicing Your Model
Once you have a 3D model, it needs to be sliced into layers for printing. This is where slicing software comes in. Most printers come with slicing software included in the package, but there a several independant options such as Orca Slicer to convert your 3D model into G-code, the language your printer understands.
When slicing, you’ll need to adjust settings like:
- Layer Height: Thinner layers result in smoother prints, but take longer.
- Infill: Determines the interior density of the print. 20% infill is common for most objects.
- Supports: Needed if your model has overhanging parts, as 3D printers cannot print in mid-air.
5. Choosing Filaments
The material you use in 3D printing is called filament. The most common for beginners is PLA (Polylactic Acid), which is easy to print with, eco-friendly, and comes in a variety of colors. Here are some filament types you might encounter:
- PLA: Best for general use, non-toxic, easy to work with.
- ABS: More durable than PLA but requires higher temperatures and ventilation due to fumes.
- PETG: A good balance between flexibility and strength.
- TPU: A flexible material used for printing soft or bendable objects.
Some of these also come in variations that include additives, such as carbon fibre or wood. These can be used to produce some very interesting prints.
There are a multitude of filament suppliers, some of which are Eryone, eSUN and Elegoo, although most printer manufacturers also supply filament. It is a case of trying a few and finding ones that you get along with.
6. Printing Your First Object
Before starting your first print, ensure the printer is correctly set up:
- Bed Leveling: The print bed must be perfectly level for successful prints. Many printers have auto-leveling features, but some may require manual adjustments.
- Filament Loading: Feed the filament into the printer’s extruder, and ensure it’s flowing correctly.
Once everything is set, load your sliced G-code file into the printer (usually via an SD card or USB), and start printing! The printer will heat up and begin the process, layer by layer.
7. Post-Processing and Troubleshooting
After your object is printed, you may need to remove it from the bed carefully. If it had supports, they can be trimmed away using tools like pliers. Sanding the surface can smooth out any imperfections.
Troubleshooting is an essential part of learning 3D printing. Common issues include:
- Warping: The corners of the object lift off the bed during printing. Try using a heated bed or adding adhesives like glue stick.
- Layer Shifting: This occurs when layers are misaligned. Check for loose belts or overheating issues.
- Stringing: Fine threads of plastic may appear between parts of your model. Check dryness of your filament and also adjust retraction settings in your slicer to fix this.
8. Advancing Your Skills
Once you’re comfortable with basic prints, you can explore more advanced topics like:
- Multi-colour Printing: With dual-extruder printers or colour-changing filament.
- Upgrading Your Printer: Add features like a better print bed, enclosure for temperature stability, or a direct drive extruder.
- Experimenting with Materials: Try printing with filaments like wood, metal-infused PLA, or flexible TPU.
Conclusion
3D printing is an exciting and rewarding hobby that combines creativity, engineering, and problem-solving. With some basic knowledge and a little patience, you can go from novice to expert in no time. Start small, experiment, and don’t be afraid to troubleshoot and learn from mistakes—it’s all part of the process. Before you know it, you’ll be designing and printing objects you never thought possible!